Login
Login
No fluff. Just free, new stuff. (Demos, credits, updates and the occasional thing we're proud of)
Thanks for subscribing! Stay tuned for demos, credits, and updates.
Comparing two documents is a routine part of both work and study. Suppose a colleague sends you a revised sales contract and you need to review every change across the pages. Word document comparison helps you quickly identify each difference, keep your content accurate, and even merge all edits into a single finalized file.
How to compare two Word documents for differences and other particular sides? This guide walks you through the procedure using 3 different ways. Each method suits different platforms, use cases, and preferences, so you can jump straight to the one that fits your needs.
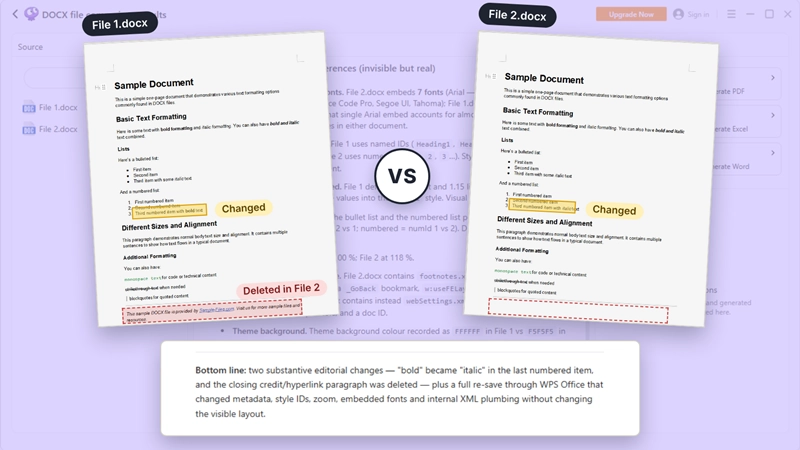
Whatever your use case, a Word document comparison tool can streamline your document reviewing process. Check out some of the common uses.
The built-in Compare feature in Microsoft Word lets you check two versions of a document without switching to a third-party program. It marks every difference, including insertions, deletions, and formatting changes, as tracked changes in a new document. You can then review them one by one or accept or reject all of them at once to produce a final version.
When to Use Microsoft Word:
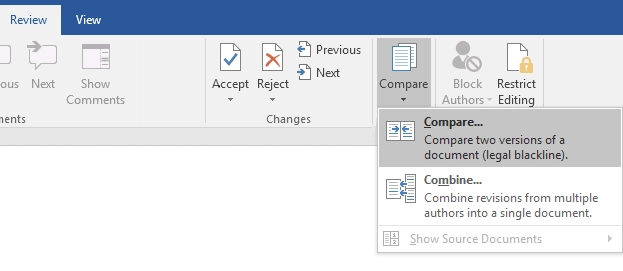
Step 1. Launch Microsoft Word and open the Review tab. Click Compare, then choose Compare from the drop-down menu.
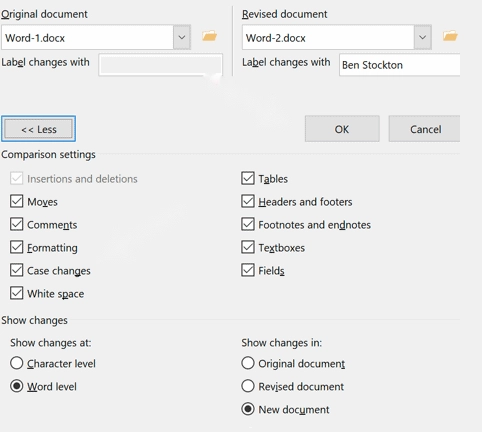
Step 2. In the dialog, select the original document and the revised document using the folder icons. Click More >> to choose which elements to track (such as comments, formatting, and case changes), whether to compare at the word or character level, and where to show the changes. You can also enter a label for the changes. Then click OK.
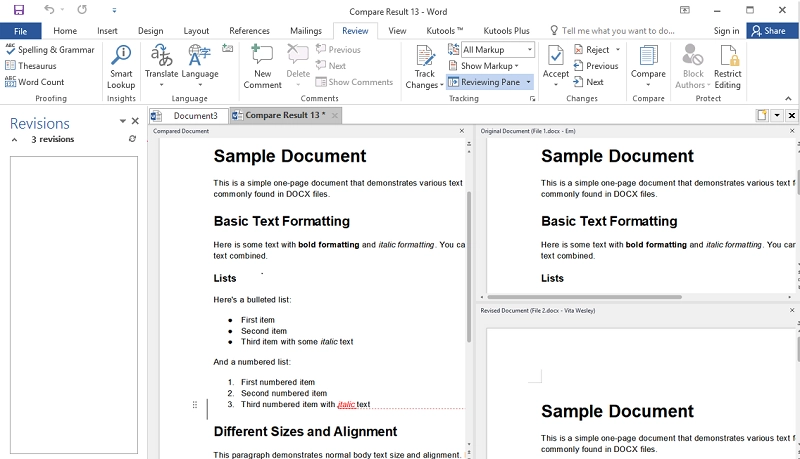
Step 3. It opens a new comparison result document in which all differences are marked. And the original and revised documents are also displayed in the right section of the window. You can easily check each addition and deletion within one document without affecting the files you have imported.
Step 4. To merge the revised version into the original, go to Review > Combine, select the two versions, and click OK. They will be merged into one soon.
If you only want to view two documents next to each other without marking the differences, use View > View Side by Side on the View tab.

People compare two Word documents for more than tracking edits and updates. Just as often, the goal is to reach a clear conclusion about what the differences mean, whether to support a decision or back up an opinion. Traditional comparison tools only list every change, which means scrolling through results page by page, and large files with complicated layouts make that even harder.
In that case, iBoomto AI is a better option. Powered by advanced cloud and local AI models, it is known as a smart document assistant supporting work and learning workflows. iBoomto AI powerfully handles multiple document comparisons in diverse file formats. With it, you only need to drop all files you want to compare and type your requirements. The desktop app will swiftly understand the inputs and summarize the differences or changes in a flash.

 Free Download Now
You can also build a personal knowledge base in iBoomto AI and access it at any time to ask questions, run comparisons, and handle other tasks without searching manually.
When to use iBoomto AI:
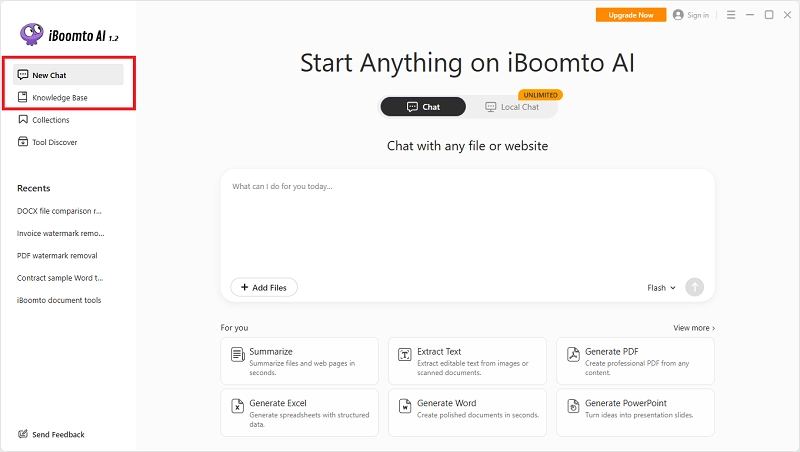
Step 1. Launch iBoomto AI and choose how you want to start. If you need to deal with the same Word documents repeatedly, go to Knowledge Base and upload the files to create a topic-specific base for easy use anytime. For a one-time, casual comparison, open the Chat tool on the homepage directly.
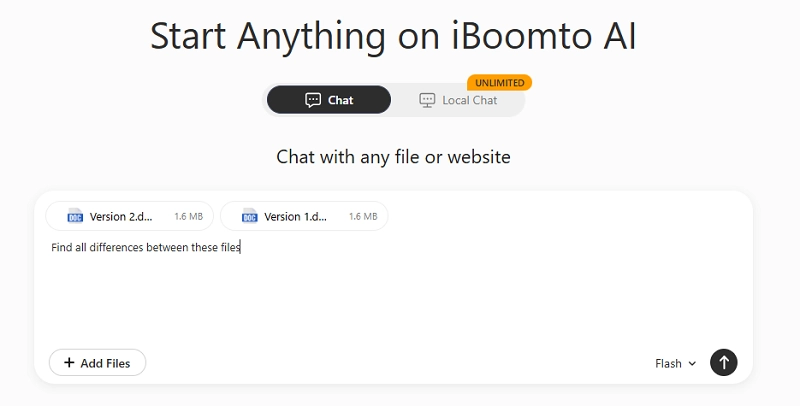
Step 2. Once the files are added, tell the chatbot how you want to compare them. For example, “Find all differences between these files”.
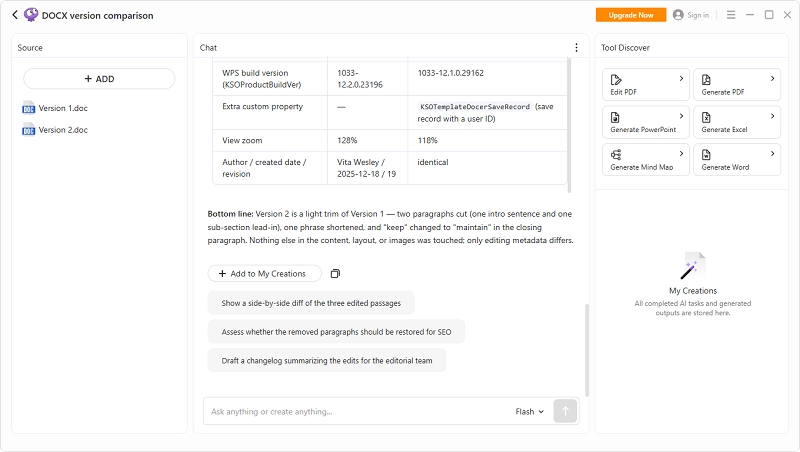
Step 3. The chatbot responds in seconds. You can ask follow-up questions to dig deeper, or download the results to your device.
Many online tools let you compare documents without installing anything. If you are looking for such a tool, Diffchecker is a nice online difference checker. It handles plain text, Word documents, PDFs, images, code, folders, and other file types across every platform.
When to use Diffchecker:
Step 1. Visit this page: https://www.diffchecker.com/word-pdf-compare/
Step 2. Upload your documents separately to the two file upload boxes. Then pick the comparison type based on your content and desired output.
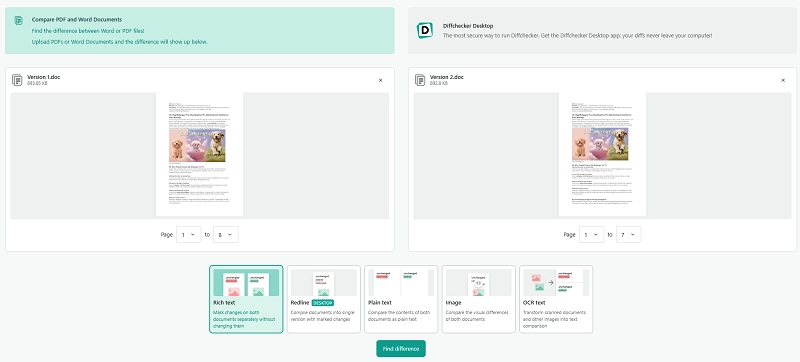
Step 3. Click Find Difference. It will analyze the content and mark all differences on a new page soon.
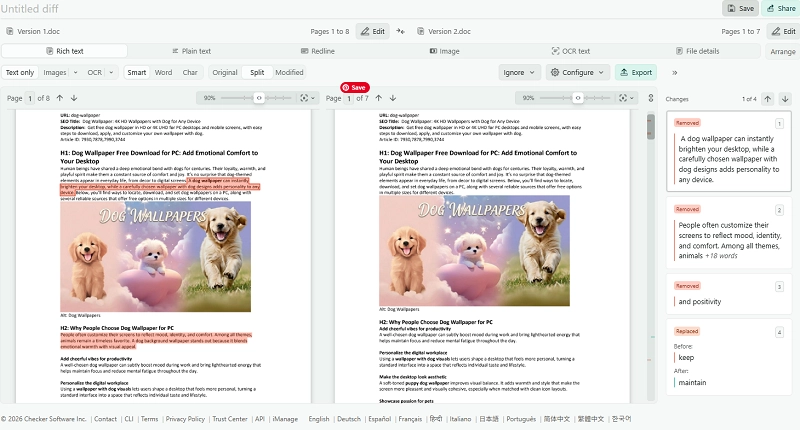
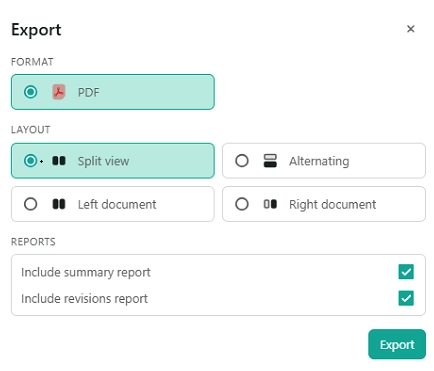
Step 4. Check out the changed elements. You can save the result as a PDF in a custom layout.
The Bottom Line
Knowing how to compare two Word documents doesn’t have to be a headache. This post showed three ways to do it, so you can pick the one that fits your task. Use Microsoft Word for tracked, line-by-line edits, an online tool like Diffchecker for quick checks of non-sensitive files, and iBoomto AI when you need a summary report of what changed and why it matters.